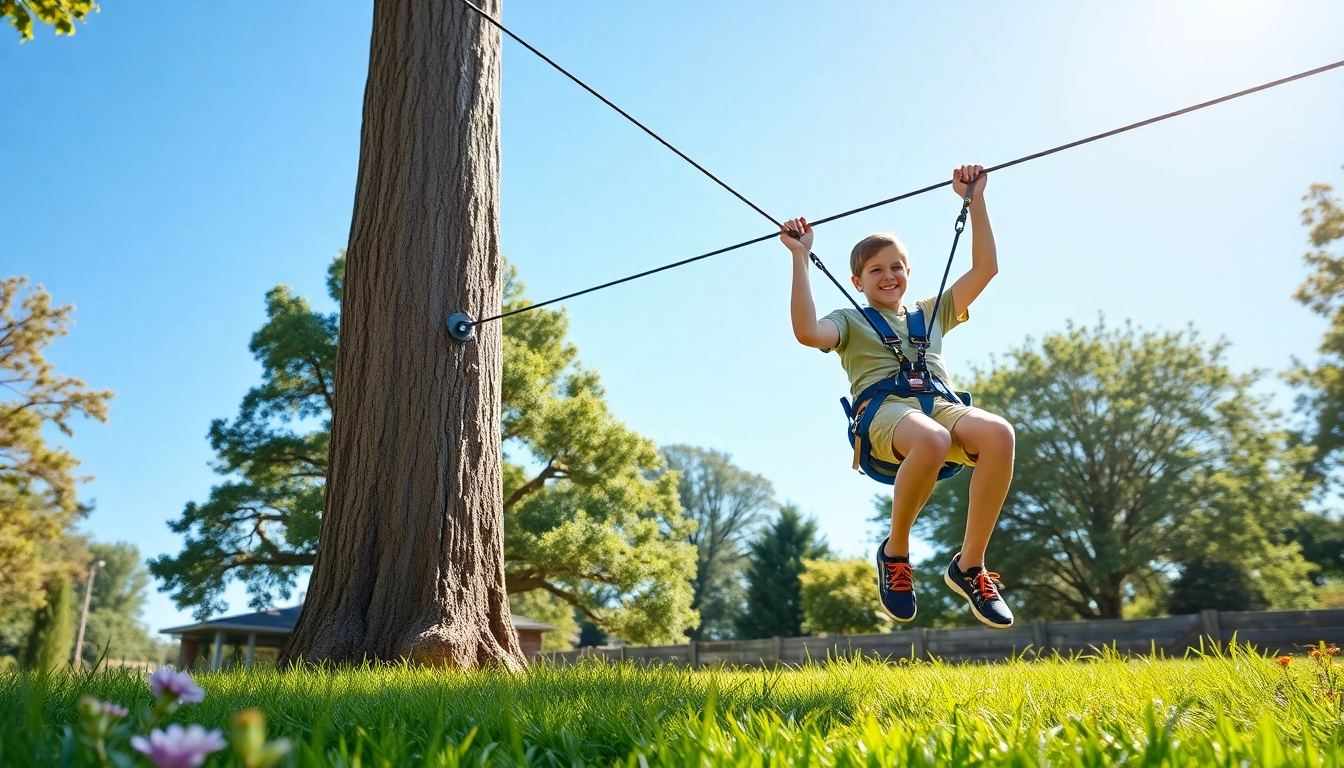
Understanding the GARDEN ZIP WIRE KIT: Features and Benefits
The GARDEN ZIP WIRE KIT offers a unique blend of adventure and fun, making it an increasingly popular feature for backyards. This kit allows individuals to experience the thrill of zipping through the air, whether they are children seeking playful excitement or adults craving an adrenaline rush. With a combination of safety, quality materials, and ease of accessibility, a GARDEN ZIP WIRE KIT can transform an ordinary garden into an extraordinary playground. It not only fosters creativity and active play but also plays a significant role in building family bonds through shared experiences.
Choosing a GARDEN ZIP WIRE KIT can enhance outdoor spaces and provide endless entertainment while promoting physical activity. To explore an extensive range of options, check out this comprehensive source on GARDEN ZIP WIRE KIT.
What Makes a GARDEN ZIP WIRE KIT Ideal for Your Backyard
A garden zip wire kit is designed to make the most of your outdoor area, providing a safe and engaging activity for people of all ages. Here are some key aspects that enhance its appeal:
- Easy Installation: Most kits come with detailed instructions that allow homeowners to set them up with minimal tools and expertise.
- Adjustable Length: Many zip line kits can be customized to fit the specific dimensions of your backyard, ensuring an ideal fit.
- Durability: High-quality materials such as galvanized steel cables and sturdy trolleys ensure longevity and safety in usage.
- Portability: While many kits are permanent installations, some are designed to be easily disassembled or relocated, offering versatility.
Key Components of a GARDEN ZIP WIRE KIT
A typical GARDEN ZIP WIRE KIT will generally consist of several critical components, each designed for optimal performance:
- Cable: The primary element that allows users to glide through the air. High tensile strength is crucial for safety.
- Trolley: This is the part that moves along the cable. A well-designed trolley can enhance ride smoothness and experience.
- Braking system: Allows for a safe and controlled stop at the end of a ride, preventing accidents and injuries.
- Safety harness: This ensures that the user is securely attached to the trolley during the ride.
- Installation hardware: Includes tree protectors, screws, and tensioning equipment to ensure everything remains intact and safe.
Safety Considerations for Using Your GARDEN ZIP WIRE KIT
Safety is paramount when it comes to any outdoor activity, and a GARDEN ZIP WIRE KIT is no exception. Here are essential safety tips to consider:
- Regular Inspections: Check the cable, trolley, and harness before every use. Look for signs of wear and tear, and replace any damaged components immediately.
- Weight Limit: Adhere to the manufacturer’s guidelines regarding weight limits for safe usage.
- Supervision: Always supervise younger children while they use the zip line to ensure they follow safety protocols.
- Safety Gear: Encourage users to wear helmets and other protective gear during rides, especially for beginners.
- Environmental Assessment: Ensure there are no obstacles like branches or power lines within the flight path that may pose hazards.
Choosing the Right Location for Your GARDEN ZIP WIRE KIT
Assessing Your Backyard Space
Selecting the right location for installation is crucial for maximizing both fun and safety. Factors to consider include:
- Space Available: Measure the distance between two strong anchor points—typically trees or posts. Ensure that the distance is sufficient to allow a smooth and exciting ride.
- Terrain: A relatively flat area is preferred as it aids in the zip line’s functioning and provides a safer environment for dismounting.
- Accessibility: Consider how easy the area will be to access for users, particularly for children, to minimize safety risks.
Environmental Factors to Consider
When choosing the perfect spot for your GARDEN ZIP WIRE KIT, environmental factors play a significant role:
- Sunlight: While direct sunlight can enhance enjoyment, too much sun exposure can lead to heat and discomfort. Positioning the line in partial shade can offer a better experience.
- Wind Direction: Be mindful of prevailing winds. A breeze can affect the ride experience, so aim to have the take-off point facing into the wind.
- Drainage: Wet ground can cause slips or affect the anchor points. Consider how water drains in your yard and choose a location that remains mostly dry.
Tree Selection for Optimal Setup
The trees (or posts) you select will serve as the anchor points for your GARDEN ZIP WIRE KIT, so make sure to pick wisely:
- Health of the Tree: Use strong,healthy trees that are free from damage, rot, or diseases to ensure stability.
- Diameter: Larger trees with a diameter of at least 8 inches are generally preferable, as they can support the tension without risk of breaking.
- Space Between Trees: Ensure there is sufficient distance between your anchor points for the desired zip line length.
Installation Process: Step-by-Step Guide to Setting Up Your GARDEN ZIP WIRE KIT
Essential Tools and Materials Needed
Before embarking on the installation of your GARDEN ZIP WIRE KIT, gather the following tools and materials:
- Drill and drill bits: Necessary for creating holes for the installation hardware.
- Wrenches: Used for tightening nuts and bolts associated with the installation.
- Level: Ensures that the cable is installed at the appropriate angle for a safe and effective ride.
- Measuring tape: Important for measuring distances when setting up the cable and marking the installation points.
- Safety gear: Don gloves and goggles during assembly to protect against potential injuries.
Preparing Your Backyard for Installation
Preparation is vital to ensure a smooth installation process:
- Clear the Area: Remove any debris, furniture, or obstacles that may interfere with the installation or riding experience.
- Mark Anchor Points: Use spray paint or markers to outline where your anchors (trees or posts) will be located.
- Determine Cable Height: Ideally, the cable should be installed at a height that balances accessibility and safety—generally between 4 to 6 feet off the ground.
Installing the GARDEN ZIP WIRE KIT Safely
Follow these steps to install the GARDEN ZIP WIRE KIT effectively:
- Set Up the Anchor Points: Securely attach the hardware to each anchor point, ensuring a strong grip.
- Attach the Cable: Connect the zip line cable to the trolleys, keeping it taut to avoid slack, which can cause issues during the ride.
- Install the Braking System: Make sure the braking system functions properly to stop users safely at the end of the ride.
- Test the Set-Up: Conduct a thorough inspection and test the line with the manufacturer’s guidelines to ensure everything is working as intended.
Maximizing Fun with Your GARDEN ZIP WIRE KIT
Creative Variations for Use
Once installed, there are numerous ways to enhance the use of your GARDEN ZIP WIRE KIT:
- Race Times: Set up a timer to encourage friendly competition among family and friends.
- Obstacle Course: Integrate other backyard activities like tires or cones to make the adventure more challenging and engaging.
- Themed Rides: Organize themed events where participants dress up and celebrate various occasions while enjoying the zip line.
Games and Activities to Enjoy
Playing games on the zip line can add a new layer of fun:
- Zip Line Capture the Flag: Introduce a gameplay element where players zip back and forth to retrieve items from opposite ends.
- Team Building Exercises: Create team challenges involving multiple zip liner sections to build cooperation and teamwork.
- Photography Sessions: Capture moments of enjoyment and laughter while zipping through the air to document memories.
Enhancing Your Experience with Accessories
Consider including various accessories to make the experience more complete:
- Comfortable Harness: Invest in high-quality harnesses that provide comfort for riders of all sizes.
- Ride-Specific Gear: Consider helmets, gloves, or knee pads to enhance safety without compromising fun.
- Decorative Elements: Design elements like flags or lights can help create a festive atmosphere during use.
Maintaining Your GARDEN ZIP WIRE KIT for Longevity
Regular Inspection and Maintenance Tips
To ensure the GARDEN ZIP WIRE KIT remains a safe and fun element of your backyard, regular maintenance is essential:
- Monthly Checks: Inspect the cable, trolley, anchors, and safety gear regularly to spot signs of wear before they lead to failures.
- Cleaning: Remove dirt and debris from cables and trolleys to prevent buildup that could impede smooth operation.
- Adjustments: Tighten any loose hardware and test the braking system regularly to ensure it remains efficient.
Storing Your GARDEN ZIP WIRE KIT During Off-Seasons
When not in use, proper storage helps retain your kit’s usability:
- Take Down the Cable: Consider removing the cable and trolleys if harsh weather is anticipated to prolong the lifespan of components.
- Secure Storage: Store hardware and accessories in dry, protected areas to avoid rusting or degradation.
- Documentation: Keep all installation guides and warranties in an accessible location for future reference.
Ensuring Safety for Future Use
Before using your GARDEN ZIP WIRE KIT after a storage period, follow these safety assessments:
- Comprehensive Inspection: Conduct a thorough inspection, especially looking for environmental impacts on the equipment.
- Re-Testing Equipment: Ensure all components work together smoothly before allowing anyone to use the zip line.
- Inform Users: Brief everyone on safety precautions and proper usage policies each time before they start using the zip line.